Sunday, January 21, 2024

Honey Garlic Chicken Tacos


Monica gave me this easy taco recipe and my family loved it so much that I have made it about 4 times in the last month!  And every time, I have to ask Monica for the recipe again because I can't find it on my phone.  So, I thought I better post this quick, so that I can find it next week when I want to make it again.


Honey Garlic Chicken Tacos
adapted from: Monica

4 Tbsp. honey
3 Tbsp. taco seasoning
6 cloves garlic, minced
2 Tbsp. oil
1/2 tsp. salt
1 lb. chicken, cut into 1 inch pieces
corn tortillas
chopped cabbage
sour cream
lime juice
chopped cilantro

In a large bowl, mix the honey, taco seasoning, garlic, oil and salt.  Toss in the chicken and coat it with the seasoning.  In a frying pan, over medium heat, cook the chicken until it is no longer pink in the center.  (Another way I have done this is to pour the mixture over some pre-cooked, shredded chicken and stir it well, then I just heated that up in a small frying pan).  In a small bowl, combine sour cream, lime juice and chopped cilantro (I just did this to taste-no recipe, although I do have a recipe for this on the blog under Cilantro Lime Crema) to make a cilantro lime crema.  Heat up the tortillas.  Layer the sour cream mixture, chicken and chopped cabbage on each taco.  Serve and enjoy!  


Sunday, October 29, 2023

Buttermilk Syrup


I've had this recipe posted along with my blueberry buttermilk waffles recipe, and my mom recently asked me to give it its own post so that she could find it easier.  I got this recipe from my aunt Julie, but since eating it for the first time at a family reunion, I have seen it all over the place!  You can get creative with this and try new things to change it up.  I have a friend who adds cinnamon to her recipe and it is delicious.  You can also use maple flavoring instead of vanilla extract.  I'm sure there are tons of other variations that you could try and it will still be amazing!  I am posting this recipe with the changes that I made and use all the time now--less butter and less baking soda (personal preference).  I'll add notes next to the ingredients, if you want to do it the high fat, extra frothy way.  


Buttermilk Syrup
by: Uncle Greg and Aunt Julie

1/4 c. butter (1/2 c. in the original)
1 c. sugar
1/2 c. buttermilk (I use 3/4 c. regular milk most of the time and it still tastes great!)
1 tsp. vanilla
1/2 tsp. baking soda (1 tsp. in the original)

In a saucepan over medium high heat, melt the butter and sugar, stirring constantly until it comes to a boil.  Add the milk (or buttermilk) and return it to a boil.  Remove it from the heat and wait one minute.  I don't know why this step of waiting one minute is important, but I haven't dared skip it for fear that my yummy syrup wouldn't come out as frothy and delicious as it should.  So just obey it.  Then stir in the vanilla and baking soda and serve it immediately.    

Sunday, July 30, 2023

Quick and Easy Naan Bread


 Tonight we had curry for dinner, and with about 15 minutes left before it was done, I decided I should make some naan bread to go with it.  Luckily for me, I found a super quick and easy recipe that took about 15 minutes to make, from start to finish.  There are a lot of recipes out there for naan, most of which have yeast and require a rise, but this one didn't call for yeast and we thought it was still really tasty and added a lot to our meal!  So, if you are in a hurry and forget to plan ahead, this naan will work in a pinch!


Quick and Easy Naan Bread
adapted slightly from www.veggiedesserts.com

1 1/2 c. flour
1 c. sour cream (it called for plain yogurt but I didn't have any)
2 tsp. baking powder
1/4 tsp. salt

Mix all the ingredients together in a medium bowl.  You may need to use your hands to get it to mix well.  I ended up kneading mine just a bit to get it to incorporate all together.  Divide the dough into 6 equal pieces.  On a floured surface, roll each piece into a 6 inch circle.  Fry it on an ungreased griddle or frying pan for a couple of minutes on each side, until it begins to get golden bubbles.  When it is cooked through, spread melted butter and garlic on each side and serve it warm.

Sunday, February 5, 2023

Easy Lettuce Wraps


I got this recipe for lettuce wraps from my friend, Camille.  We used it for a Young Women activity on easy meals that our girls could make when they go away to college.  And this one is easy!  We love lettuce wraps at my house, and this is such a delicious, fast recipe, that it is now something that I feel like I can make more often (my other recipe takes a lot longer to prepare).  We also used ground beef as the meat, which I am more likely to have on hand than ground chicken or ground turkey (which is what other recipes use).  But feel free to substitute other ground meats in place of the ground beef.  You can also get creative with the chopped veggies you add.  It calls for water chestnuts, but last time I made it I also diced up carrots and added those, as well, and the original recipe called for a package of cole slaw to be added.


Easy Lettuce Wraps
from: Camille Bell

1 lb. lean ground beef (or turkey or chicken)
1/4 tsp. garlic powder
1/2 c. teriyaki sauce
1 can water chestnuts, diced
ground pepper to taste
1 head of lettuce

In a frying pan, over medium high heat, brown your ground beef.  Drain the grease.  Add the garlic powder, teriyaki sauce, diced water chestnuts and pepper.  Reduce heat to medium and let it simmer for a few minutes.  Serve it on your lettuce, rolling the lettuce leaf around the meat like a taco.

Thursday, November 24, 2022

Pecan Pie


Jim loves pecan pie but I don’t love it, so on Thanksgiving I usually just buy him one from any grocery store bakery.  This year I couldn’t find one, so I decided to try making one myself.   I used a recipe I found on Allrecipes, and made a few modifications based on comments from other users.


Pie crust:

1 1/4 cup flour

1/4 tsp salt

1/2 butter, chilled

3 Tbsp ice water


Whisk the floor and salt together, then add the chilled butter, cutting well with a pastry cutter for as long as you can stand to do it.  Add the water 1 Tbsp at a time, mixing it with a fork until you can form it into a ball.  Roll it out with wax paper on top, then line a 9” pie pan.


Pie filling:

1/2 cup butter, melted and cooled slightly

2 eggs

1 cup light brown sugar

2 Tbsp flour

1 Tbsp milk

1 tsp vanilla

1 1/2 cups pecans 

1/2 cup semi-sweet chocolate chips (optional)


Blend the eggs well until they are foamy, then add the melted (but not hot) butter and mix it in.  Add the brown sugar and mix well.  Add the vanilla and milk and mix well.

Chop all but a handful or so of the pecans and mix those in with the chocolate chips (optional).

Pour the mixture into the shell.  Cover the edges of the pie crust with foil.  Bake at 350 for 10 minutes, then add the handful of pecans to the top, and turn the temperature down to 300 and cook for another 40 minutes or so. Remove the foil around the edge for the last 5-10 minutes.

Don’t forget the vanilla ice cream!


Sunday, June 5, 2022

Creamy Maple Syrup


I love breakfast food.  But lately, I have been a little sick of breakfast, and I realized why.  It's because I am bored with the syrup!  I found this recipe for Creamy Maple Syrup, and suddenly, my waffles were exciting again!


Creamy Maple Syrup
slightly adapted from: abountifulkitchen.com

1 c. heavy cream
1/2 c. brown sugar
1/2 tsp. maple flavoring
dash of salt
1/2 tsp. vanilla

In a saucepan over medium heat, bring the cream and brown sugar to a boil.  Let it boil for one minute and then remove it from the heat and stir in the maple flavoring, salt and vanilla.  Serve it over your favorite (again) breakfast food.

Sunday, March 20, 2022

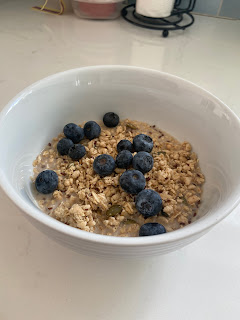
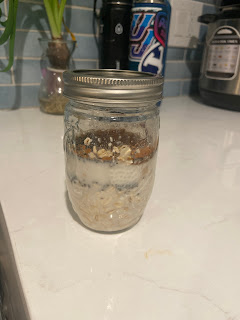
Overnight Oatmeal


I guess it is time to jump on the Overnight Oats bandwagon.  I saw a recipe for this one day, and the next day, the Internet was feeding me recipe after recipe of overnight oatmeal.  I've read many of the recipes, and they are all very similar, so I'm putting this on here as the base that I have been using, but you can change it up and add any fruit/nuts/nut butter/flavoring/yogurt that you think would be delicious, and it probably will be!  I eat mine cold, with granola and fruit on it, and it has been a delicious, hearty, quick meal in the morning for me.


Overnight Oatmeal
by: www.abountifulkitchen.com

1/2 c. plus 2 Tbsp. almond milk
1/3 c. old fashioned oats
1 1/2 tsp. chia seeds
1 1/2 tsp. brown sugar
1/4 tsp. cinnamon
1/4 tsp. vanilla

Pour all the ingredients into a jar, shake it up really well, and place it in your fridge overnight or for 8 hours.  The next morning, give it another shake to stir it up again and then pour it into a bowl.  Top with granola, fresh fruit or coconut.


Sunday, January 2, 2022

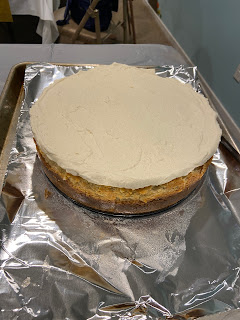
Pumpkin White Chocolate Mousse Cheesecake

This was my pick for my Thanksgiving pie this year (The kids and I go over our pie wishes each year and try to make at least a few of them.  I love Thanksgiving pies!!)  It was my first time making a cheesecake and using my springform pan that I've had for 16 years, so that was exciting!  I followed the recipe exactly and it turned out great!  The pumpkin flavor was light, the cheesecake flavor was mild and the white chocolate and graham cracker crust both added a yummy sweetness.  Making it was a little time consuming, but it wasn't difficult, and it was SO delicious!  I would definitely make it again!

Pumpkin White Chocolate Mousse Cheesecake
by: melskitchencafe.com

Crust:
2 c. graham cracker crumbs (about 14 rectangle crackers)
2 Tbsp. brown sugar
1/2 tsp. cinnamon
1/8 tsp. nutmeg
1/2 c. salted butter, melted

Cheesecake:
3 packages softened cream cheese (I used Philadelphia brand because I wanted it to set up right and had read on her blog that more expensive brands work better)
1 1/2 c. sour cream
3 Tbsp. cornstarch
1 1/2 c. sugar
1 tsp. cinnamon
1/2 tsp. nutmeg
pinch of cloves
1 tsp. vanilla
1 15 oz. can of pumpkin puree (or 2 c. homemade puree, which is what I used)

White Chocolate Mousse Topping:
1 c. heavy whipping cream
1/4 tsp. vanilla
2 Tbsp. powdered sugar
1/4 tsp. cinnamon
pinch nutmeg
4 oz. softened cream cheese
4 oz. white chocolate, melted (I had also read on her comments that a nicer brand of white chocolate work best-I used Lindt)

Preheat your oven to 375 degrees.  For your crust, stir together the graham cracker crumbs, brown sugar, cinnamon, nutmeg and melted butter and press it into the bottom and slightly up the sides of a 9 or 10 inch springform pan.  Line a baking sheet with foil and set the springform pan on it while baking, for 8 minutes, until the crust is lightly golden.  Remove it from the oven and let it cool completely.  Reduce the oven to 350 degrees.

For the cheesecake, whip together the softened cream cheese and sour cream and then add the cornstarch, sugar, cinnamon, nutmeg and cloves and mix it until it is combined.  Stir in the vanilla and pumpkin puree.  Pour the batter onto your crust and spread it evenly.  Bake it on the foil lined baking sheet for 45-60 minutes, until the edges are set and the center jiggles slightly.  Be aware, a 9 inch pan will be more full and will take longer to bake.  Remove it from the oven and let it cool completely. 

For the white chocolate mousse topping, beat the cream and vanilla until soft peaks form.  Add the powdered sugar, cinnamon and nutmeg and mix it until slightly stiffer peaks begin to form.  In a separate bowl, beat the cream cheese until it is fluffy.  Add in the white chocolate and mix it until it is smooth and creamy.  Gently fold together the white chocolate and cream mixtures until the mousse is nice and creamy (fold gently and carefully so you don't deflate the cream).  Spread the topping over the cooled cheesecake and refrigerate for at least 1-2 hours.  Serve and enjoy!


Sunday, September 26, 2021

Acorn Squash in the Instant Pot


This has been a great year for squash in my garden!  I cooked my acorn squash up tonight, and it turned out delicious and was so easy.  I didn't even peel it first!  So fast on the prep!

Acorn Squash in the Instant Pot

1 Acorn Squash, washed and cut into 2 inch pieces, with seeds removed
2 Tbsp butter
kosher salt
fresh ground pepper
1 c. water
fresh rosemary

Place your cut squash in your Instant Pot, sitting on the trivet.  Add 1 cup of water.  Sprinkle the squash with the salt and pepper.  Rub the rosemary between your fingers and sprinkle it over the squash.  Cook it on high pressure for 8 minutes and do a quick release.  And enjoy!


Sunday, May 23, 2021

Korean Rice Bowl


I made this the other day for something easy and different, and my family loved it!  It really was so quick and easy and used ingredients that I always have on hand.

Korean Rice Bowls
by: therecipecritic.com

1 lb. ground beef
3 cloves garlic, minced
1/4 c. brown sugar
1/4 c. soy sauce
2 tsp. sesame oil
1/4 tsp. ground ginger
1/4 tsp. crushed red pepper flakes
1/4 tsp. pepper
cooked rice
sliced green onions for garnish

In a large skillet, cook the ground beef and minced garlic until the beef is cooked through (no pink).  Drain any grease.  In a small bowl, whisk together the brown sugar, soy sauce, sesame oil, ground ginger, crushed red pepper flakes and pepper.  Pour it over the ground beef and let it simmer for one minute.  Serve it over the rice and garnish it with the green onions.


Sunday, February 21, 2021

Grandma Losee's Famous Banana Bread

My Grandma Losee recently passed away, and it was mentioned multiple times at her funeral how she was known for her Banana Bread.  This came as somewhat of a surprise to me, because that isn't something that I remembered her for.  But, when her recipe got passed around the cousins, and I made it and then tasted it, the taste totally brought back feelings of being at Grandma's when I was younger!  And, it is a really moist, delicious banana bread.  So now, I will remember Grandma when I eat her yummy banana bread!  She was an amazing woman!  (My kids dove right into the loaf before I could even take a picture, so I put in a pre-cooked picture, but know that looked and tasted amazing).


Banana Bread
by: June Losee

3 or 4 ripe bananas (I used 4)
1 c. sugar
1 egg
1 1/2 c. flour
1 tsp. baking soda
1 tsp. salt
1/8 c. melted margarine (I used butter)
optional 1 c. chocolate chips or nuts

Mash the bananas.  Add the other ingredients and mix it well.  Stir in the chocolate chips or nuts.  Pour into a greased and floured loaf pan.  Bake it at 350 degrees for 1 hour to 1 hour 10 minutes.


Sunday, November 8, 2020

Our Favorite Quinoa and Ground Beef Sloppy Joes


This is our family's favorite sloppy joe recipe.  Full disclosure: I don't have an actual recipe.  I make it to taste every time.  But, I can never remember exactly what I add and I always end up googling "Sloppy Joe Recipe" so I can see a general idea of what to add.  So, this time I paid attention to what I added so that I can put the recipe on here and find it for next time!


Our Favorite Quinoa Sloppy Joe Recipe                                                                         
by: Carolyn

1/2 or 1 pound ground beef
1/2 c. quinoa
ketchup (if I were to guess, I would say close to a cup of ketchup)
about 1 Tbsp. Dijon mustard (or regular)
onion powder
garlic powder
salt
pepper
about 3 dashes of liquid smoke (this is to taste-add a little less than this and then add more if needed)
about 1 c. water

Cook your quinoa according to package directions (I cook mine in double the water in my rice cooker).  In a large frying pan, brown your ground beef over medium heat.  Drain the grease and add your cooked quinoa to the pan.  Add the ketchup, mustard, onion powder, garlic powder, salt, pepper and liquid smoke and stir it well.  Taste it!!  If it doesn't have enough flavor, add more garlic, onion or salt.  Taste it again!! Add more of what you feel like it might need.  Repeat as needed!  Stir it again.  Add the water and stir it well.  Simmer it over medium low heat until you are ready to eat it.  (And maybe taste it one more time to see if needs anything else!).  Serve on a hamburger bun (or hotdog bun, as you see in my picture) with sliced cheddar cheese. 


Sunday, August 16, 2020

Homemade Bagels (for a fraction of the cost of store bought)

During quarantine, back in April, we practiced our pioneer skills of making everything homemade, and this was one of the recipes we tried at that time.  And it was one of my favorites!  To me, these bagels tasted almost exactly like Einstein Bagels, and when we figured out the cost, homemade bagels cost around .08 cents per bagel, and a fresh, store bought bagel costs $1.80!

Homemade Bagels
by: sallysbakingaddiction.com

1 1/2 c. warm water
2 3/4 tsp. instant or active dry yeast
4 c. bread flour
1 Tbsp. brown sugar
2 tsp. salt
1 egg white, mixed with 1 Tbsp. water
2 quarts water
1/4 c. honey

In your kitchenaid mixer (or by hand), mix together the warm water and yeast, cover and let it rest for 5 minutes.  Add the flour, brown sugar and salt and beat it on low speed for 2 minutes.  The dough will be stiff and a little dry.  Turn the dough onto a lightly floured surface and knead it (by hand) for 4-5 minutes.  Place the dough into a large bowl, sprayed with non-stick cooking spray.  Cover it, and allow it to rise until it is double in size, for about 60-90 minutes.  Line two cookie sheets with parchment paper.  When the dough is ready, punch it down and divide it into eight equal pieces.  Shape each piece into a ball.  Press your finger through the middle of the ball to make a hole and shape it into a bagel shape.  
Cover the bagels with a light towel and let them rest for a few minutes while you prepare the hot water bath.  Preheat your oven to 425 degrees.  Fill a large pot with 2 quarts of water and the honey.  Bring it to a boil then reduce the heat to medium-high.  Drop the bagels in the water and cook them for 1 minute on each side, then remove them and place them on your lined cookie sheets.
Using a pastry brush, brush the egg white mixture on the top and sides of each bagel.  If you want to sprinkle some (or all) of them with cinnamon sugar, or some other delicious topping, now is the time to do it.  Otherwise, they will be plain bagels, which were also delicious.  Bake them for 20-25 minutes, rotating the pan halfway through.  The bagels will be golden brown.  

Sunday, July 12, 2020

Honey Chipotle Lime Chicken Bowl with Cilantro Lime Rice


I found this recipe the other day and it sounded so fresh and summer-y!  We are loving grilled chicken right now (maybe because we don't have a kitchen...) and all the flavors in this bowl worked so well together.  It was delicious!

Honey Chipotle Chicken Marinade
by: melskitchencafe.com

2 Tbsp. oil
2 Tbsp. lime juice
2 Tbsp. honey
2 Tbsp. chopped adobe peppers in chipotle sauce (get as much sauce as you can)
1 Tbsp. Dijon mustard
2 tsp. minced garlic
3 Tbsp. chopped fresh cilantro
1/2 tsp. kosher salt
pinch of black pepper
2 lbs thin cut chicken breasts

In a bowl, stir together all the ingredients and then add the chicken.  Marinate it for 2-24 hours.  I did mine for most of the day, and it was so tender!  Cook your chicken on the grill or in the oven, or however you prefer.  Slice it in strips.

Cilantro Lime Rice
adapted from: melskitchencafe.com

1 Tbsp. butter
1 1/4 c. rice
2 1/2 c. chicken broth
1/2 tsp. salt
1/4 tsp. freshly ground pepper
juice and zest of 1 lime
2 Tbsp. chopped fresh cilantro
1/4 tsp. ground cumin

I make my rice in a rice cooker, so I just added all these ingredients to my rice cooker, stirred them, and then cooked them as usual.  

Bowls
add to your bowl any of the following:

marinated chicken breast strips
cilantro lime rice
lettuce
sliced avocados
chopped tomatoes
lime wedges


Sunday, June 7, 2020

Chicken Bacon Ranch Alfredo Bake


The name of this recipe leaves no guessing as to what it is!  Ha ha!  But, it is easy and delicious and my whole family likes it, so it is definitely worth putting on here!

Chicken Bacon Ranch Alfredo Bake
adapted from: pillsbury.com

1 lb. cooked pasta
2 c. cooked shredded chicken
1 jar alfredo sauce
3/4 c. ranch dressing
6 slices cooked chopped bacon (I actually just used some of my real bacon bits)
2 c. shredded cheese (I used a pizza blend)

Heat oven to 350 degrees.  In a large bowl, stir together the cooked pasta, chicken, alfredo sauce, ranch dressing and bacon.  Pour it into a 9X13 pan and sprinkle the cheese over the top.  Bake it for 15-20 minutes or until it is hot and bubbly.

Saturday, April 18, 2020

Easy 100% Whole Wheat Bread (Small Batch-2 Loaves)

I have never been super successful on homemade bread.  Which is shameful because I come from a long line of amazing bread makers.  I've tried a few times, and if my mom was standing right next to me through the process, it seemed to work out pretty good, but as soon as I was by myself, I ended up with bread that looks like this:
Why?  I have no idea.  But, now that we are in a Corona Virus Quarantine, I am taking this opportunity (and this necessity) to learn to make yummy, normal looking homemade bread!  Someone recently brought me a delicious, beautiful loaf of bread, so as soon as the Quarantine started, I called her and asked her for her recipe.  It turns out I was making it much harder than I needed to.  This recipe kneads it using my Kitchenaid mixer and only rises once.  It kind of makes me feel guilty because it is so easy, but it looks like I worked really hard!

Easy Whole Wheat Bread
adapted from: melskitchencafe.com

5-6+ c. whole wheat flour
1 1/2 Tbsp. active yeast
1/4 c. vital wheat gluten
2 3/4 c. warm water
1 Tbsp. lemon juice
1/3 c. oil
1/3 c. honey
1/2-3/4 Tbsp. salt

In the bowl of your stand alone mixer (mine is a Kitchenaid), stir together your yeast, 3/4 cup of the warm water and a pinch of sugar.  Cover it with a towel and let it sit for 5 minutes to activate the yeast.  After 5 minutes your yeast should look nice and foamy.  Add 3 cups of flour, gluten and 2 more cups of warm water to your yeast mixture and stir it using a wooden spoon.  Cover it with the towel again and let it rest for 10-12 minutes.  Add the lemon juice, oil, honey and salt and mix it on low speed, using your dough hook.  

With the mixture running on low speed, continue adding flour 1/2 cup at a time until the dough pulls away from the sides of the bowl and it isn't too sticky.  I have found that I need a little more than 6 cups total flour to get mine to the right consistency.  I also have to occasionally use my wooden spoon to scrape the flour off the bottom of the bowl.  From Mel's recipe, she says "A little stickiness is ok, as long as the dough forms a ball and doesn't leave a lot of residue on your fingers."  And that is pretty much exactly how mine turns out.  Let the mixer knead the dough for 5-6 minutes on low speed.  (Once mine is done kneading, I find that it is a little stickier than it was when I started kneading, but the bread is coming out nice and soft, so I think that is ok).   


Turn the dough onto your greased counter (I spray mine with cooking spray) and divide it in half.  Shape each half into a smooth loaf and place it in a lightly greased loaf pan.  The pan size that I have found to be the most successful is the one that is 8 1/2 X 4 1/2 X 2 1/2.  Cover your pans lightly with a towel and let them rise for about an hour, or until they are 1-2 inches above the pans.  Here is another tip that I have had to figure out: my kitchen is never super warm, and my bread wasn't rising very well.  Now, I heat my oven to 200 degrees, and then turn it off and open the oven door.  My bread is rising on top of my oven and this little added heat seems to make all the difference for how well it rises.  Yay!  When your bread has risen, preheat the oven to 350 degrees and bake the bread for 28-32 minutes, or until it is golden brown on top and baked through.  When you take it out, turn it onto a wire rack and brush the top with butter.  And, please eat a slice warm, with butter and honey, and think of me!  

Wednesday, April 15, 2020

Homemade Soft Pretzels

 My kids and Dustin are lovers of soft pretzels, and I am not.  Something about the salty bread, dipped in hot cheese just grosses me out.  However, after Grant begging me to make these for a really long time, and in light of the fact that we have a lot more time to bake right now (Corona Quarantine), we decided to give it a try.  This was a great recipe--easy and delicious and actually really fun for everyone to participate in.  I even enjoyed my soft pretzel (of course, I sprinkled mine with cinnamon sugar and dipped it in frosting, so it was more of a dessert, but there had to be a compromise!) 

Soft Pretzels
by: sallysbakingaddiction.com

1 1/2 c. warm water
1 packet (2 1/4 tsp.) yeast
1 tsp. salt
1 Tbsp. brown sugar
1 Tbsp. unsalted butter, melted and slightly cooled
3 3/4 to 4 c. flour
coarse salt for sprinkling (I used kosher salt)
9 c. water
1/2 c. baking soda

Mix the yeast, a pinch of sugar and the warm water in your mixing bowl, cover it and allow it to rest for 5 minutes.  Add the salt, brown sugar and melted butter and stir it together.  Slowly add 3 cups of the flour, 1 cup at a time.  Mix it with a wooden spoon, or the dough hook on your Kitchenaid until the dough is thick.  Continue slowly adding the last cup of flour as needed, until your dough is no longer sticky.  If you poke it with your finger and it bounces back, it is ready to knead.  Plop the dough out onto a floured surface and knead it for 3 minutes and then roll it into a ball.  Cover it lightly and allow it to rest for 10 minutes.  This is a good time to get your water and baking soda solution ready.  

Preheat your oven to 400 degrees and line a large baking sheet with a silicone mat or parchment paper lightly sprayed with cooking spray.  Divide your dough in half, then each of those halves in half again and then do that again (to make 12 equal dough balls-did that make sense?).  Roll each dough ball into a 20-22 inch rope, and then shape them into a pretzel shape by "taking the ends and drawing them together so the dough forms a circle.  Twist the ends, then bring them towards yourself and press them down into a pretzel shape."  We just kind of made ours into a knot shape and some were better than others, but that is what gave them their charm.  

Bring the baking soda and water solution to a boil.  I periodically stirred this with a wire whisk throughout the process.  Drop 1-2 pretzels into the boiling water at a time, for 20-30 seconds.  Any more time than that and your pretzels will have a metallic taste, which a couple of ours did.  I would lean more toward 20 seconds.  Using a slotted spatula, take the pretzels out of the water and let the water drip off before placing them onto your baking sheet.  Sprinkle the pretzels with the salt (or cinnamon sugar, if you are like me).  Bake them for 12-15 minutes at 400 degrees or until they are golden brown.  When they are done, you can serve them warm with nacho cheese, or frosting!


Tuesday, April 7, 2020

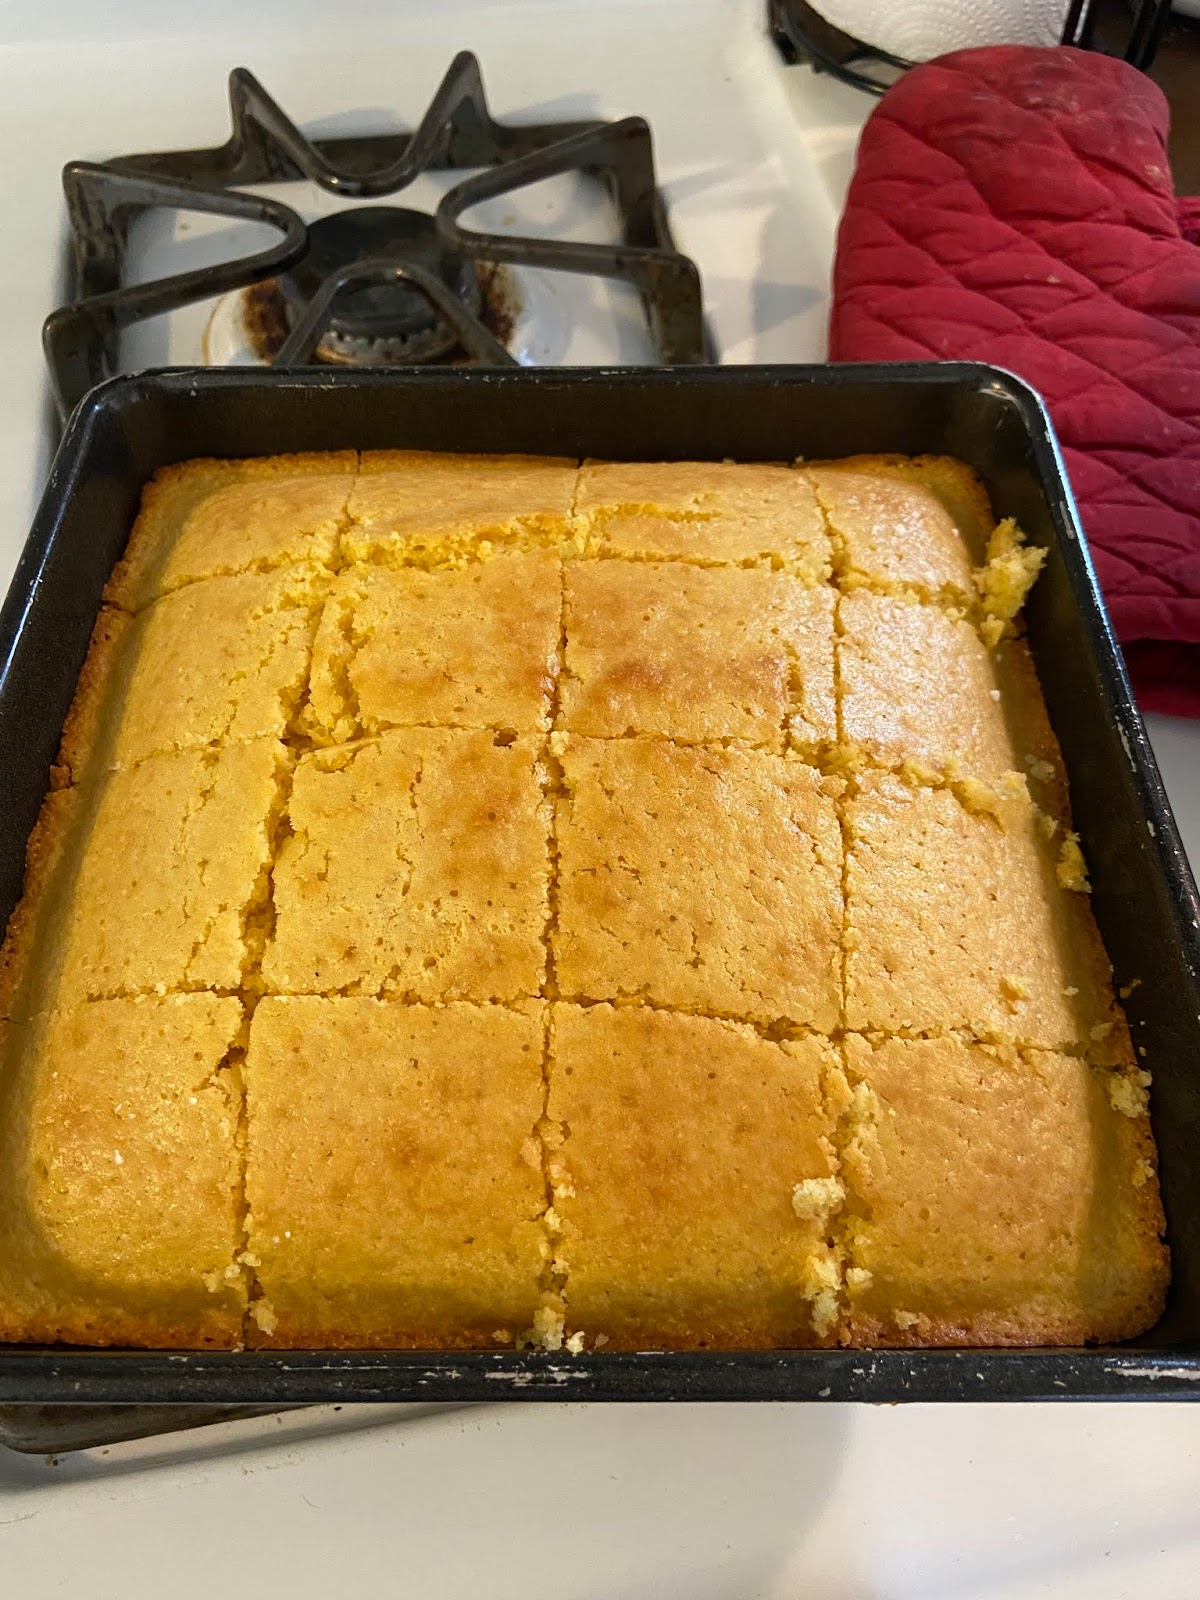
Golden Sweet Cornbread

I have made this cornbread recipe a couple of different times, and it is always so delicious!  It is sweet, moist and my family loves it!

Golden Sweet Cornbread
by: allrecipes.com

1/2 c. butter
2/3 c. sugar
2 eggs
1 c. buttermilk (I used 1 Tbsp. lemon juice mixed with milk to make 1 cup)
1/2 tsp. baking soda
1 c. cornmeal
1 c. flour
1/2 tsp. salt

Preheat your oven to 375 degrees.  Spray an 8 inch square pan with cooking spray.  Melt the butter in a large frying pan over medium heat.  When it is melted, remove it from the heat and stir in the sugar.  Add the eggs and quickly beat the mixture until it is well blended.  Combine the baking soda with the buttermilk and stir it into the mixture.  Add the cornmeal, flour and salt and stir it until it is smooth.  Pour the batter into the prepared pan and bake it at 375 degrees for 30 minutes, or until a toothpick inserted in the center comes out clean.


Sunday, February 9, 2020

BBQ Chicken Tacos with Coleslaw

One day, in the midst of being so tired of my regular dinner foods, Nicole shared a new recipe with me, that I happened to have the ingredients for.  I made it for dinner that night, and my family couldn't get enough of it!  It was so delicious!  The coleslaw with the barbecue chicken was so great together.  It was a nice twist on a typical weeknight meal.  I highly recommend these tacos!

BBQ Chicken Tacos
adapted from: eatingwell.com

1/3 c. sour cream (or Greek yogurt)
1 Tbsp. sugar
1 Tbsp. lemon juice
1 Tbsp. cider vinegar
3/4 tsp. kosher salt
1/4 tsp. pepper
dash of hot sauce (I'm pretty sure I used sriracha sauce)
2 c. shredded cabbage
2 c. shredded cooked chicken breast
1/3 c. of your favorite bbq sauce
corn tortillas
cilantro

In a small bowl, stir together the sour cream, sugar, lemon juice, cider vinegar, kosher salt, pepper and hot sauce.  Add the shredded cabbage and stir it until it is coated with the sauce.  In a sauce pan over medium heat, stir together the shredded chicken and the barbecue sauce until it is hot.  Fill the tortillas with barbecue chicken, top it with the coleslaw and cilantro, and enjoy!


Sunday, December 29, 2019

Fluffy Egg Nog Pie


Every Thanksgiving, my kids and I try to find a new, fun pie to make.  This year we tried Egg Nog Pie.  It was a favorite from our pie table.  If you like egg nog, you should love this pie!

Egg Nog Pie
by: www.meatloafandmelodrama.com

1 prepared pie crust (I made a no bake graham cracker crust the day before)
1 3.4 oz box instant vanilla pudding
1 1/2 c. egg nog
2 c. whipped topping
dash nutmeg

In a large bowl, combine the pudding and egg nog and mix it until it is thick.  Sprinkle in the nutmeg.  Fold in the whipped topping and spread it into your pie crust.  Refrigerate it for 2 hours or until it is firm.