Showing posts with label Thanksgiving. Show all posts

Sunday, January 2, 2022

Pumpkin White Chocolate Mousse Cheesecake

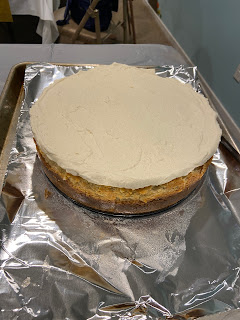
This was my pick for my Thanksgiving pie this year (The kids and I go over our pie wishes each year and try to make at least a few of them.  I love Thanksgiving pies!!)  It was my first time making a cheesecake and using my springform pan that I've had for 16 years, so that was exciting!  I followed the recipe exactly and it turned out great!  The pumpkin flavor was light, the cheesecake flavor was mild and the white chocolate and graham cracker crust both added a yummy sweetness.  Making it was a little time consuming, but it wasn't difficult, and it was SO delicious!  I would definitely make it again!

Pumpkin White Chocolate Mousse Cheesecake
by: melskitchencafe.com

Crust:
2 c. graham cracker crumbs (about 14 rectangle crackers)
2 Tbsp. brown sugar
1/2 tsp. cinnamon
1/8 tsp. nutmeg
1/2 c. salted butter, melted

Cheesecake:
3 packages softened cream cheese (I used Philadelphia brand because I wanted it to set up right and had read on her blog that more expensive brands work better)
1 1/2 c. sour cream
3 Tbsp. cornstarch
1 1/2 c. sugar
1 tsp. cinnamon
1/2 tsp. nutmeg
pinch of cloves
1 tsp. vanilla
1 15 oz. can of pumpkin puree (or 2 c. homemade puree, which is what I used)

White Chocolate Mousse Topping:
1 c. heavy whipping cream
1/4 tsp. vanilla
2 Tbsp. powdered sugar
1/4 tsp. cinnamon
pinch nutmeg
4 oz. softened cream cheese
4 oz. white chocolate, melted (I had also read on her comments that a nicer brand of white chocolate work best-I used Lindt)

Preheat your oven to 375 degrees.  For your crust, stir together the graham cracker crumbs, brown sugar, cinnamon, nutmeg and melted butter and press it into the bottom and slightly up the sides of a 9 or 10 inch springform pan.  Line a baking sheet with foil and set the springform pan on it while baking, for 8 minutes, until the crust is lightly golden.  Remove it from the oven and let it cool completely.  Reduce the oven to 350 degrees.

For the cheesecake, whip together the softened cream cheese and sour cream and then add the cornstarch, sugar, cinnamon, nutmeg and cloves and mix it until it is combined.  Stir in the vanilla and pumpkin puree.  Pour the batter onto your crust and spread it evenly.  Bake it on the foil lined baking sheet for 45-60 minutes, until the edges are set and the center jiggles slightly.  Be aware, a 9 inch pan will be more full and will take longer to bake.  Remove it from the oven and let it cool completely. 

For the white chocolate mousse topping, beat the cream and vanilla until soft peaks form.  Add the powdered sugar, cinnamon and nutmeg and mix it until slightly stiffer peaks begin to form.  In a separate bowl, beat the cream cheese until it is fluffy.  Add in the white chocolate and mix it until it is smooth and creamy.  Gently fold together the white chocolate and cream mixtures until the mousse is nice and creamy (fold gently and carefully so you don't deflate the cream).  Spread the topping over the cooled cheesecake and refrigerate for at least 1-2 hours.  Serve and enjoy!


Sunday, March 4, 2018

Orange Glazed Candied Yams (Cooked in the Instant Pot)


You know I love it, right?  I can't get enough of my Instant Pot Pressure Cooker.  I don't think I have even used my slow cooker since I figured this gem out.  I recently needed to make candied yams, and I whipped these babies out in a fraction of the time by using my Instant Pot.  I did an orange juice glaze, for a little bit of a change, and they got rave reviews!

Orange Glazed Candied Yams
adapted from: allrecipes.com

7-8 yams (depending on how big they are--you can do as many as you would like and will fit)
1/4 tsp. salt
1/2 c. brown sugar
1/2 tsp. cinnamon
1/4 tsp. nutmeg
1 c. orange juice
2 Tbsp. butter
mini marshmallows

Wash but don't peel the yams and place them in the Instant Pot (I put mine on the steamer that came with the Instant Pot).  Pour in one cup of water.  Secure the lid and turn the valve to seal.  Use the manual mode and set to pressure cook on high for 15 minutes.  Do a natural release for 10 minutes.  Manually release any pressure that is remaining.  Take the yams out of the Instant Pot, and when they are cooled enough to touch, the skin should easily peel off.  Cut the yams into 1 inch squares and place them in a 9X13 pan.  In a saucepan, mix together the salt, brown sugar, cinnamon, nutmeg, orange juice and butter, until the butter and sugar are dissolved.  Pour it over the sliced yams.  Spread the mini marshmallows over the top of the yams and toast them in your oven, on broil.  Watch them close!  Unless you love burned marshmallows.


Sunday, November 25, 2012

Lawry's Coconut Banana Cream Pie

One of my favorite things about Thanksgiving is putting our pinterest to good use and choosing delicious pie recipes that make us drool as we browse the endless sea of "so good!", "the best!", and "delicious!" that pinterest has to offer.  This is one of the (4) pies that we made this year!  It was my favorite for sure, and the favorite of many of our family members too.  The direct quote (that I kept because I'm too lazy to change what other people write when they pin it) from when I pinned it is: "Heads up coconut lovers, this pie is amazing, totally decadent, and the coconut crust is absolutely awesome. The crust takes it from ordinary to sublime."  Okay, if a recipe has amazing, decadent, and absolutely awesome in its description, it's got to be good.  No one would be that liberal with their choice of words unless it was true...


Well, luckily for me it was true.  How embarrassing to make a pie at Thanksgiving that is only "really good".


This pie was pretty awesome.  Absolutely awesome, if you will.  The coconut crust almost made a cookie or macaroon-ish crust that was so yummy.  The homemade vanilla pudding was great too.  If I ever want to make this pie in a crunch (most of the time comes from letting things chill before putting it together), I will just do a boxed vanilla pudding, although it wouldn't taste quite as yummy. 


So, thanks to Jan Can Cook, who took the time to scout out this recipe from L.A. Food Times, we can all enjoy "absolutely wicked awesome decadence" in the form of this pie. (You can quote me on that.)


Lawry's Coconut Banana Cream Pie 
adapted from Jan Can Cook

Active Work Time: 20 minutes * Total Preparation Time: 30 minutes plus 2 hours chilling 

Coconut Pie Shell 

1/2 cup (1 stick) butter, plus more for pie plate 
3 cups sweetened flake coconut 

Lightly butter a 9-inch pie plate and set aside. 

Melt the 1/2 cup butter in a large skillet over medium heat and brown the coconut flakes, stirring constantly, about 5 minutes. They should be golden brown. Press the coconut firmly and evenly in the pan to form a shell. Chill the crust 30 minutes before filling. 

Pie Filling 

4 egg yolks 
3/4 cup sugar, divided 
3 tablespoons cornstarch 
1/4 teaspoon salt 
1/4 cup flour 
3 cups half-and-half, divided 
Yellow food coloring 
2 teaspoons vanilla extract 
2 bananas 
1 cup whipping cream 
1 tablespoon powdered sugar 

Combine the cornstarch and flour.  Pour a little at a time into a tightly sealed container with 1 cup of the half-and-half.  Shake vigorously until there are no lumps.  Continue to add the remaining flour/cornstarch mixture until no lumps remain.  Combine the egg yolks, 1/4 cup of the sugar, and salt in a small bowl. Gradually add the half-and-half mixture and whisk.

Combine the remaining 2 cups half-and-half and 1/2 cup of the sugar in a 3-quart saucepan and bring just to boil over medium heat. Add the egg mixture and cook and stir until the mixture returns to a boil and thickens, about 1 minute. 

Remove from the heat. Stir in 2 drops of food coloring and the vanilla. Cover the surface with plastic wrap to prevent a skin from forming. Let cool. 

Slice the bananas into the pie shell. Pour the filling into the shell. 

Whip the cream with the powdered sugar until stiff. Spoon in dollops or pipe with a pastry bag around the edge of the pie. Chill 2 hours before slicing. 


*Notes from my experience: 

It seemed like the coconut was going to be way too much to fit in the pie pan as a crust.  I got wax paper and pressed firmly until it resembled a crust.  This worked but it was a little hard to cut into afterwards.  Some readers from this website, Jan Can Cook, said the same thing, but others didn't have a problem with that.

Also, I changed the directions slightly to make the pudding recipe.  It said to mix the egg yolk with the dry ingredients, two of them being cornstarch and flour, which I did, then to mix them into the cup of half-and-half.  It wouldn't mix in with the liquid at that point.  It just made egg yolk clumps at the bottom of my bowl.  I had to scratch that and start over.  It worked well to mix it first with the cornstarch and flour, and then add the other ingredients. 


Sunday, November 18, 2012

Creamy Dreamy Pudding Pie

I had to give this an exciting name, because although this is the best way to make a pudding pie, you can't tell from this picture.  Just trust me.  Once you make this switch, you will never go back to regular, pasty pudding pie. I'm not sure where this came from, maybe the back of a pudding box years ago, but it is the only way I ever make a pudding pie now.

Creamy Dreamy Pudding Pie

1 small box of instant pudding, any flavor
1 1/4 cup milk
1 8 oz. carton cool whip
1 prepared pie crust
shaved chocolate, mini chocolate chips, toasted coconut, bananas or whatever you want to garnish your pie with

In a large bowl, mix the pudding and milk until well mixed.  Add approximately 2/3 of the cool whip to the pudding and stir it gently.  Pour it into your pie crust and smooth it out.  Spread the remainder of the cool whip over the top.  If you would like, sprinkle something yummy on the top of the pie.

Sunday, November 11, 2012

Perfect Pie Crust


This is the perfect pie crust.  I know because the recipe told me that it was.  And then it said something in French.  So it must be.  And I have to say, it was the best crust I have ever made.  And when you see how much butter is in this, you won't be surprised at how flaky, buttery and delicious it is.  It would be worth trying this with a little less butter (Nicole, I leave that to you).  For the purpose of my Relief Society Pie Making Class that I taught, I kept all that artery clogging deliciousness in it.  After all, I wouldn't want to mess with perfection!

Perfect Pie Crust (double crust recipe)
adapted from: simplyrecipes.com

2 1/2 c. flour
1 c. unsalted butter, very cold, cut into 1/2 inch chunks
1 tsp. salt
1 tsp. sugar
6-8 Tbsp. ice water

A tip that the above website gave was to cut the butter into cubes and then freeze it for at least 15 minutes. I read on multiple websites that very cold butter is a key to a successful pie crust.  I did that, then combined the flour, salt and sugar in a medium bowl.  When my butter was chilled, I dumped it into the flour mixture.  I followed directions very closely on this recipe (which I rarely do, but I really wanted this crust to turn out right).  I followed the ingredients exactly, but it was suggested to do the crust in a food processor.  Mine isn't big enough, so I did it the old fashioned way, which I prefer anyway, and used a pastry blender and some muscle to cut in the butter until the crumbs were pea sized.  A tablespoon at a time, add the ice water.  In between tablespoons, using a fork, squish the water and the flour mixture together until it forms a ball.  Another key to a successful pie crust is to not add too much water.  When you have enough water that you can form it into a ball (even if it is still flaky) that is enough.  Place the dough ball on the table and smash it into two discs with the palm of your hand.  According to simplyrecipes.com, this will flatten the butter between the layers of the flour and make your crust extra flaky.  Kind of like some people I know...  Wrap the discs in plastic wrap and refrigerate it for 1 hour, or up to 2 days.  After an hour, take out one disc and let it sit for a few minutes.  Roll out the dough onto a lightly floured surface into a 12 inch circle.  Place the crust into your pie tin and gently press it onto the bottom and sides.  Add your pie filling.  Roll out the second disc into a 12 inch circle.  Lay it over the top of the pie and pinch the edges to seal it.  And then you can try to make it look pretty.  However, it is really unnecessary to do that because this pie is so flaky and yummy that it won't matter if you made it look pretty, or not.  You will want to make sure and either poke some holes with a fork in the top, or make a slit or two, to release the steam while it cooks.

Sunday, November 4, 2012

Bacon Wrapped Thanksgiving Turkey

I cooked a turkey.  That deserves it's own sentence because I think I've only done this one or two other times.  I am right smack in the middle of a big family, so I am never in charge of the turkey at Thanksgiving.  Pies, yes, sweet potatoes, yes (the day we ate this turkey, I nearly burned Jen's house down while roasting the marshmallows on top of the sweet potatoes).  For this turkey, I wanted to try something different.  Something daring.  Something involving bacon.  Actually, I found this recipe on allrecipes and it got amazing reviews and I happened to have what I needed, so it was the winner.  It is called Sherry's German Turkey Recipe.  Maybe they eat turkey this way in Germany?  If you are German, let me know.  I prepared it the night before, which was lovely.  And it was good.  Very good.  It was deliciously moist and flavorful.  So if you happen to be the turkey maker for Thanksgiving, give this one a shot.

Bacon Wrapped Turkey
adapted from: allrecipes.com (Sherry's German Turkey)

1 whole turkey, neck and giblets removed
1 onion, cut in half
1 large carrot, peeled and cut in half
1 stalk celery (I didn't use this)
1 apple, stem removed and cut in half
1 orange, yes, you guessed it, cut in half
1/4 c. vegetable oil
1 tsp. salt
1 Tbsp. pepper
1 tsp. Lawry's season salt
1 pound sliced, smoked bacon
1 turkey oven bag

Preheat your oven to 350 degrees.  Rinse the turkey and pat it dry with paper towels.  Shove the carrot, celery, onion, apple and orange into the cavity of your bird.  Think of this like a puzzle.  You may have to move things around to get it to work, but it will all fit in there.  Rub the oil all over the outside of the turkey and then sprinkle the salt, pepper and season salt on the bird and rub it all over as well.  Put the turkey into an oven bag (follow your oven bag's directions at this point.  Mine said to shake flour around inside the bag before putting the turkey in.  Just be obedient to the directions on the oven bag prep.)  Set the turkey (inside the oven bag) in a roasting pan.  Lay the strips of bacon all over the outside of the turkey.
One pound is a lot of bacon, so I was able to cover the turkey and then cover it some more.  Right now, you can either cook the turkey, or if you are doing this the night before, put it in your fridge until morning.  If you are cooking it, tie up the bag and make slits in it (again, follow whatever directions come with the bag).  Roast the turkey for about 4 hours, or until the internal temperature reaches 180 degrees (taken at the thickest part of the thigh).  When it is done, let it rest for 20 minutes, or so.
I didn't take any pictures of the finished product, but it looked just like this except the bacon was cooked!
Fruliche Geburtstag tsu dier!  (That actually means Happy Birthday to you, because I don't know how to say Happy Thanksgiving.)

Thursday, December 29, 2011

Lemon Angel Pie


Here's one of my favorite pies!  It's actually a recipe from two different cookbooks.  The crust is from "Betty's Pies", a yummy pie shop in Minnesota that we've been to, and the filling is from the "Lion House Desserts" cookbook. 


Lemon Angel Pie


Crust:

2 large egg whites
1/8 tsp. cream of tarter
1/2 c. granulated sugar

Preheat oven to 275 degrees

Beat egg whites until frothy.  Add cream of tarter.  Beat until stiff peaks form using electric mixer on high speed.  Gradually add sugar, 2 tbsp. at a time until one half cup has been added.  Continue beating until stiff, glossy peaks form.

Grease 10-inch pie pan and spread meringue on bottom and up sides of pie pan using a rubber spatula.

Place on bottom rack in oven and bake at 275 degrees for one hour.  Turn off oven, open door ajar and let meringue cool in the oven.  Fill with desired filling.


Filling:

1/2 c. water
2 tbsp. sugar
1 egg
1 tbsp. cornstarch
1 tbsp sugar
1 1/2 tbsp fresh lemon juice
zest of 1/2 lemon
1 1/2 tsp. butter

1 c. vanilla chips
1 8-ounce package cream cheese
1/2 c. whipped cream, sweetened with a little sugar
1 tbsp. toasted almonds

Put water and 2 tbsp. sugar in saucepan and bring to a boil.  In a large bowl, mix egg, cornstarch, 1 tbsp. sugar, and lemon juice.  Slowly add hot water to egg mixture in bowl, then pour entire mixture back into pan.  heat until thickened, stirring often.  Remove from heat and add zest of lemon and butter.  Stir until mixed and cool.

Pour two-thirds of filling in bowl.  Add vanilla chips to the filling remaining in pan.  Stir until chips are melted.  Place cream cheese in bowl.  Add filling with vanilla chips to cream cheese and beat together.  Spread this mixture in bottom of pie shell.  Spread remaining two-thirds of lemon filling on top.  Chill two hours.

Top with whipped cream and garnish with toasted almonds.


(Side note: The last time we made it, we made extra of the tart lemon filling afterwards to add a little extra tartness. Yum.)

Quick and Easy Sweet Potato Casserole

I know I'm a little late, but I figured I should get this posted so I can use it the next time I randomly have a hankering for a Thanksgiving dish.  When we were preparing the dishes for Thanksgiving this year, I forgot all about the sweet potatoes until it was too late to bake them.  I decided to mix a few recipes together and made a stove top sweet potato casserole.  And if I may say, there were some at the Thanksgiving feast who don't normally like sweet potatoes and had second helpings.  So if you're looking for a quick and delicious sweet potato dish at your... next Thanksgiving meal, try this one.


Quick and Easy Sweet Potato Casserole


3-4 large sweet potatoes
3-4 tbsp. butter
1/3 c. brown sugar
cinnamon
3/4 c. pecans

Peel sweet potatoes and microwave on a plate with a little water for 5-8 minutes until soft when stuck with a fork.  When done, chop roughly.  Melt butter and sugar in dutch oven skillet.  Toss pecans in and stir on med/low heat until coated and starting to caramelize (about 3-5 minutes).  Toss in sweet potatoes and stir with spatula until well coated.  Sprinkle cinnamon to coat and continue to sauté potatoes around until ingredients are mixed in.  Sweet potatoes will mash slightly.  Pour into a glass baking dish and throw a few small marshmallows on the top (I mostly put them on because you can’t have Thanksgiving without sweet potatoes oozing with extra sugar).  I wanted to make sure everything stayed moist so I decided to shave tiny pieces of butter off of the stick and distribute them across the potatoes. Stick in oven on broil until marshmallows are slightly browned and melty.  (Do you like that word?)

Sunday, December 11, 2011

Garlic Rosemary Turkey

Do you eat turkey or ham at Christmas?  This was the recipe I used for our Thanksgiving turkey this year and even though that holiday has come and gone, I thought I'd post it, just in case you are a turkey eater at Christmas.  I tweaked this recipe from The Sister's Cafe and thought it had a great flavor.  The rosemary was delicious!  It got rave reviews from my family as well.  Our turkey was a 25 pound bird, so if yours isn't as big, you may not need all that butter mixture.  


Rosemary Garlic Turkey
adapted from: The Sister's Cafe


1/2 c. butter, softened
3 Tbsp. minced garlic
2 Tbsp. dried rosemary (or use fresh)
1 1/2 Tbsp. salt
2 tsp. pepper
1 onion, cut into fourths
4 celery stalks


In a small bowl, mix together the softened butter, garlic, rosemary, salt and pepper.  Thaw your turkey according to the package directions.  Remove all the nasty stuff that you are supposed to remove.  Loosen the skin from the turkey by shoving your fingers in between the turkey and the skin.  Do this all around the breast area, as well as the top of the thighs.  Take the butter rub in your hand and rub it all around the top of the turkey (underneath the skin).  Rub butter in the cavity of the bird as well.  In fact, I just went ahead and rubbed that turkey all over with the butter.
When the turkey is good and buttered, cook it.  I cooked my turkey in a bag.  I followed the directions on the bag for how long to cook the turkey and at what temperature.  The only thing I did differently was that I followed my mother-in-law's advice and placed the turkey on top of the celery stalks and onion slices, inside the bag.  One tip that I have is to pay close attention to the temperature of your bird while it is cooking.  It cooked much faster in the bag than we expected and so, by the time we realized and then finished up the meal preparations, the turkey was a little over cooked.  It's OK though.  My family likes it that way so that we aren't nervous the whole time we are eating that we are going to end up with salmonella.  We're a little fanatical about our poultry.   Happy Thanksgiving! (or Merry Christmas!)

Sunday, January 16, 2011

Pumpkin Whoopie Pies

Monica suggested Pumpkin Whoopie Pies for a Thanksgiving desert this year, and they were a big hit.  I combined a few recipes I found online because I really wanted the cream cheese in the filling.

Pumpkin Cookies:
2 cups packed brown sugar
1 cup vegetable oil
1 1/2 cups canned pumpkin puree
2 eggs
3 cups flour
1 tsp salt
1 tsp baking powder
1 tsp baking soda
1 tsp vanilla
1 1/2 Tbsp cinnamon
1/2 Tbsp ground ginger
1/2 Tbsp ground cloves

Cream Cheese Filling:
4 oz. cream cheese, softened to room temperature
6 Tbsp softened butter
1/2 tsp vanilla extract
1 1/2 cups powdered sugar

Preheat the oven to 350 degrees
First you need to make the cookies.  Combine the oil and brown sugar, then mix in the pumpkin and eggs.  Add the remainig dry ingredients and mix well.  The consistency will be somewhere between a cake mix and what you would expect for cookies.  Drop by heaping teaspoons onto a lightly greased baking sheet and bake for 10 to 12 minutes.  Let the cookies cool.

Next make the filling.  Beat the cream cheese, butter and vanilla until fluffy.  Mix in the powdered sugar until will blended.


When the cookies are cool, spoon the filling onto the flat half of a cookie, and top with the flat side of another cookie.  Store in a refrigerator.  Note: I made the mistake of stacking my cookies on top of each other, and since they are moist, they did stick a little.  But they still tasted delicious!